
A customizable, laser-cut, retro, chunky, Do-It-Yourself, miniature video arcade cabinet for the Raspberry Pi.
Need some good office desk swag? Miss the old days of those not-so-portable hand-held game consoles? Want to feel proud of building your own arcade cabinet without sacrificing the space? Need a home for your Raspberry Pi?
This is your dream.
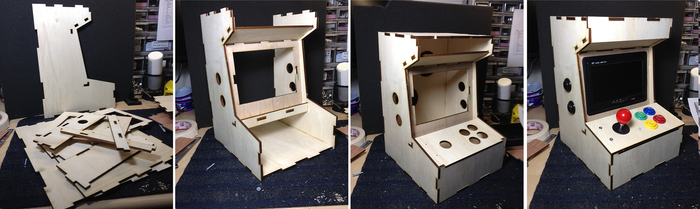
The Porta-Pi is a desktop-sized arcade cabinet kit. The final project includes all the parts (except the Raspberry Pi) and detailed instructions to have your own functioning mini arcade cabinet.
The Complete Kit will include:
- Laser Cut cabinet, ready to assemble. Approx 13″x9″x10″ (HxWxD)
- 7″ LCD screen
- (1) Commercial arcade joystick (micro-switch style)
- (8) Commercial arcade buttons and micro-switches
- Speakers with amplifier PCB (~6W, Stereo Class D)
- 16GB SD card with any software I can legally distribute
- The appropriate power cords and adapters for what’s included.
- All misc wiring harnesses, connectors, and hardware.***The Raspberry Pi is not included in any kits**
Why It’s Awesome…
You get a well engineered kit that turns your Raspberry Pi into the complete arcade experience in a mini-sized, customizable, and hand crafted DIY arcade cabinet. Enjoy all the classic games in the form they were meant to be played on, built by you, customized by you, with all the head-aches engineered and solved by me.

Don’t want to use a Raspberry Pi? No problem! The cabinet can accommodate small, older video game consoles. The joystick and buttons can be hard-wired to the console’s controller turning it into a dedicated unit! Or, fit a mini-ITX motherboard inside and it becomes a super powered mini PC arcade!
Note: No games/ roms are included.
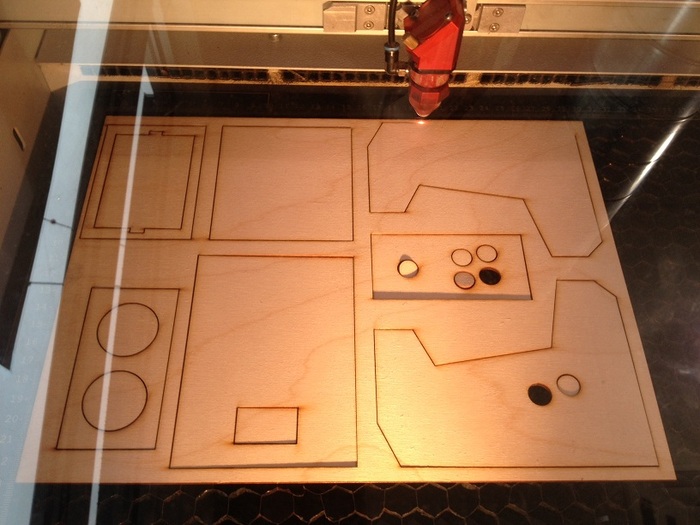
Easy assembly. All holes are pre drilled and the cabinet assembles like a giant puzzle with strong interlocking finger joints. A little glue is all you need!
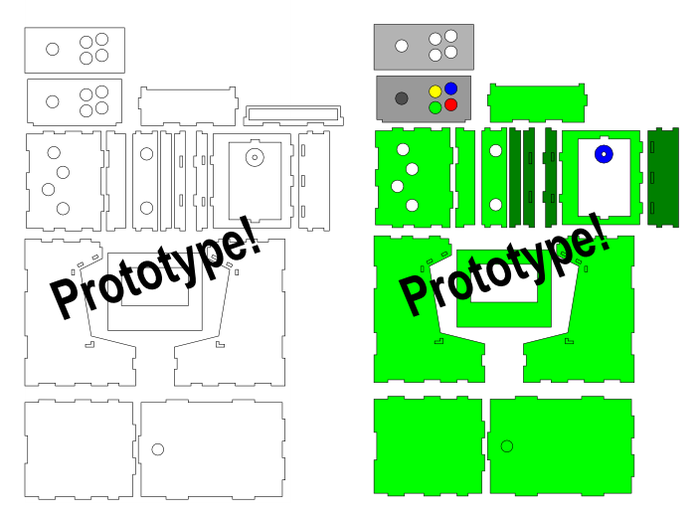
The Porta-Pi Kit is in its late prototype phases.You can see its progress here atretrobuiltgames.com (and my other work). I want to share my passion with all the retro gamers, hackers, and DIY-ers out there, But I can’t do it alone.
Why I need your support.
I’ve been building small sized arcade cabinets for a numbers of years, but mass-producing this wonderful kit has some challenges. Both due to the number of parts required and the advanced tools needed to cut the panels.
I will need to buy materials in bulk quantities (wood, arcade parts, wires, PCBs and more). There are many components to this kit, and bulk buys have big price tags. I also need a laser cutter for large volume production and quick design verification.
>>>>>>>>>>>>>>>>>>>>>>>>>>>>>>>>>>>>>>>>>>>>>>>>>>>>>>>>>
Origin Story
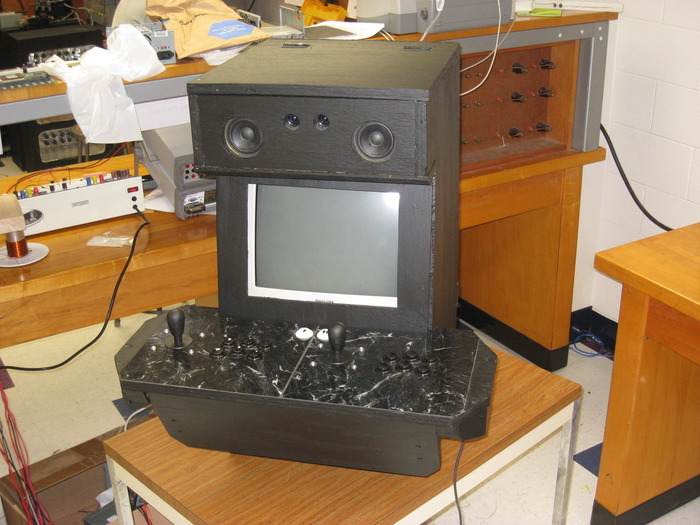
The origins of the Porta-Pi started before the Raspberry Pi existed. It spawned from a hobby I’ve been doing since 2008- building table-top arcade cabinets, or MAMEs (Multiple Arcade Machine Emulators). Since I discovered emulators on the PC, I’ve been looking for an ‘authentic’ experience when playing my favorite retro games. One day in 2008 I decided to build a small arcade (about 30” tall and 20” wide) to house a Pentium III PC, monitor, and mount some controls. Why? Because it would be awesome. With a budget of $110, this is what derived:
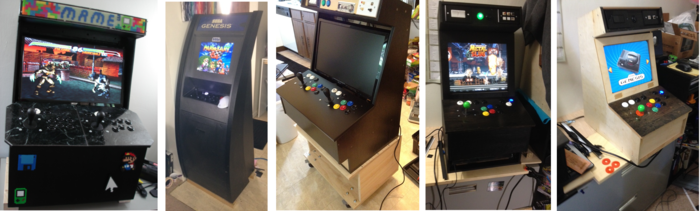
It was crude, but its popularity at college hinted I was onto something. Over the next four years, every cabinet I built was a little better than the last. I developed more confidence in my wood working skills, designing, planning, and even painting!
Unfortunately, these cabinets didn’t have the follow through to match the attention they received. The finished cabinets are roughly 1/3 the size of tradition cabinets from the 80’s and 90’s. They received great attention and admiration from the video game enthusiast community, but, there remained a caveat: “I don’t have the space for that right now” or, “It’s just out of my price range” was the feedback I got most. Size and cost was still an issue preventing mass appeal.
I would agree. Not surprising enough, size was just as much as issue for me, since a one-bedroom apartment is not ideal to build an inventory upon, nor is a small vehicle great for moving these when they don’t fit inside it.
Shrinky-dink it.
Inspiration came from everywhere. Fun-sized candy bars, “smart” cars, and the general trend of consumer electronics was evidence that- smaller is better. I was convinced it can be done.
The Port-Pi begins its life.
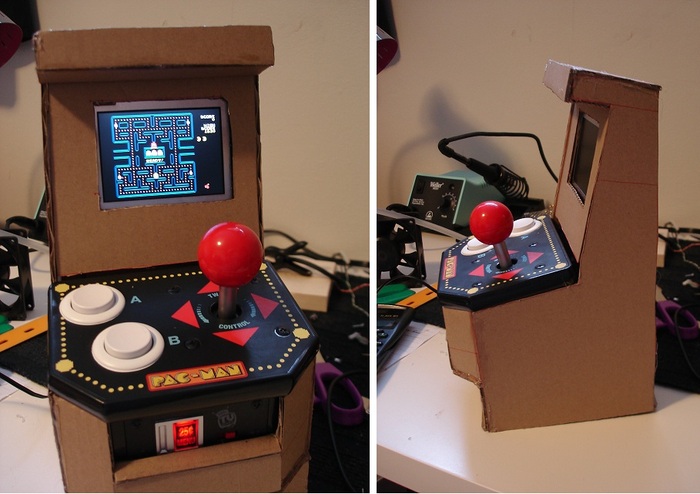
In late 2011 I started experimenting with miniature-sized MAMEs. Keeping the original designed used for my larger cabinets, but scaled down 60%. Now, compared to traditional cabinets, this new concept measures at 1/8th the size; fun-size territory. I made my first model from cardboard, a 3” LCD screen, and a Plug-n-Play TV Pac-man game console.
I thought it didn’t look too ridiculous, So I refined the design and built the second model from wood.
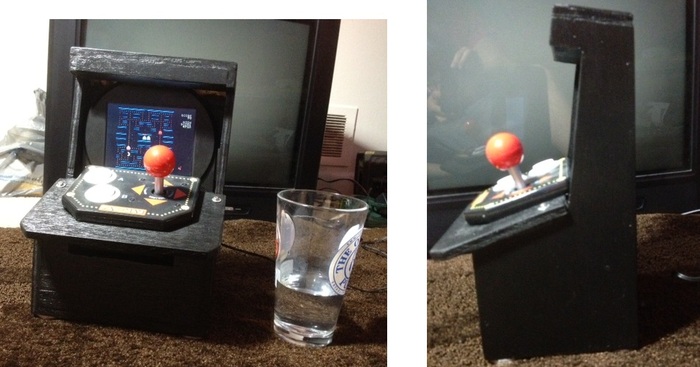
It seemed feasible, but I had no clue how to produce this easily. I was still pretty rough with wood working. Also, I wasn’t really pleased with the “hack-ability” or quality of the TV Plug-n-Play devices. Building a miniature cabinet around them felt like a miss-matched union of my work and something I didn’t feel was up to par. So, nothing happened after that.
Then 10 months ago I found out about the Raspberry Pi. The Pi Community was quick to put emulators on it. I soon followed. The tiny arcade cabinet was brought back to life! This time with a real system! I quickly built a proof-of-concept cabinet from ½” plywood (left over from a previous MAME project).

I took the Porta-Pi PoC to the Pittsburgh Mini-Maker Faire in April. It was a huge hit! The feedback and praise was incredible! I knew more could be done.
Since April 2013 I’ve been polishing the idea. I’ve been focusing on making this tiny arcade cabinet a “kit”. Logistically, it makes perfect sense.
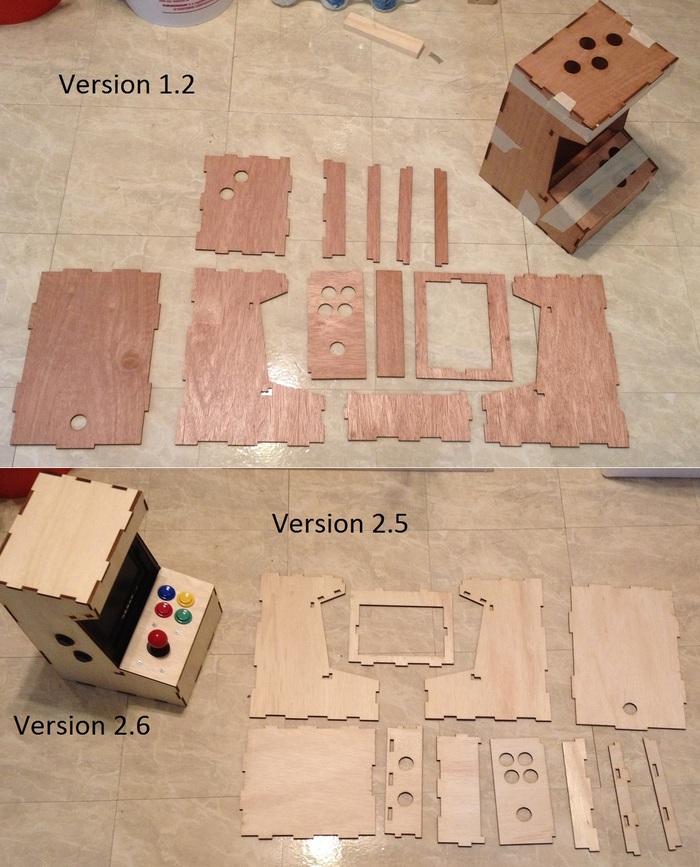
The obvious improvements are a tool-free laser cut cabinet and other small details like integrating the arcade controls directly to the Pi’s GPIO headers. The early proof of concept used a Teensy 2.0+ to convert the controls to a generic USB HID keyboard. Removing this step saves costs, and reduces overall complexity of the kit tremendously. I’ve got the software written for the integrated GPIO controls, and I plan to include it on the SD cards in the full kits.
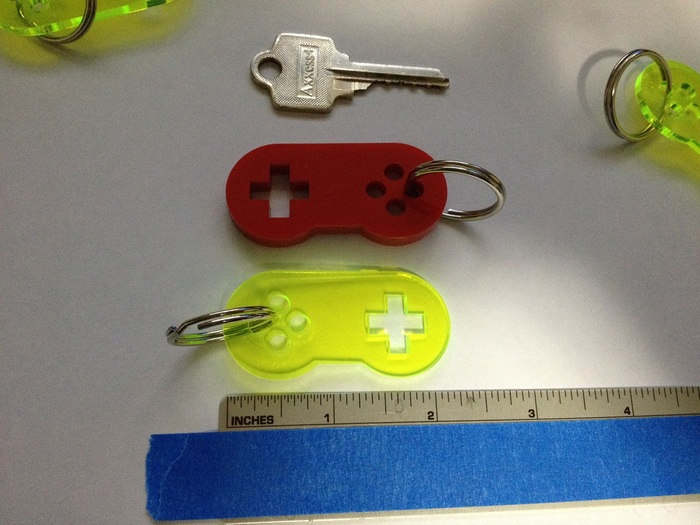
Oh, and this is what that key chain reward might look like…
>>>>>>>>>>>>>>>>>>>>>>>>>>>>>>>>>>>>>>>>>>>>>>>>>>>>>>>>>>
Over Achiever
$42K
If my kickstarter meets its goal and exceeds it by over $6k, all versions of kits will come with extra panels!
These extra panels will have different mounting locations for more buttons, moving the speakers to a different location, or swapping out the panels with a new paint job!
Stick around for more unlock-able goals!
<<<<<<<<<<<<<<<<<<<<<<<<<<<<<<<<<<<<<<<<<<<<<<<<<<<<<<<<<
Thank you, for taking this time to check out my project!