
A common problem that landscape photographers face is that the sky is often a lot brighter than the ground below it, causing an exposure issue in frame. Typically, the sky will either be too bright or the ground too dark.
However, don’t panic. Clifton Cameras have a quick and easy solution to battle the exposure issues you face when photographing landscape — a graduated neutral density filter, which is often referred to as an ND Grad. Although circular ND Grads are available, most are square or rectangular and are designed to slip into a filter holder that attaches to the end of a lens via an adaptor ring. One half of the filter is clear, while the other half is a neutral grey. It’s this grey section that does the magic by reducing the amount of light that reaches part of the sensor/film.
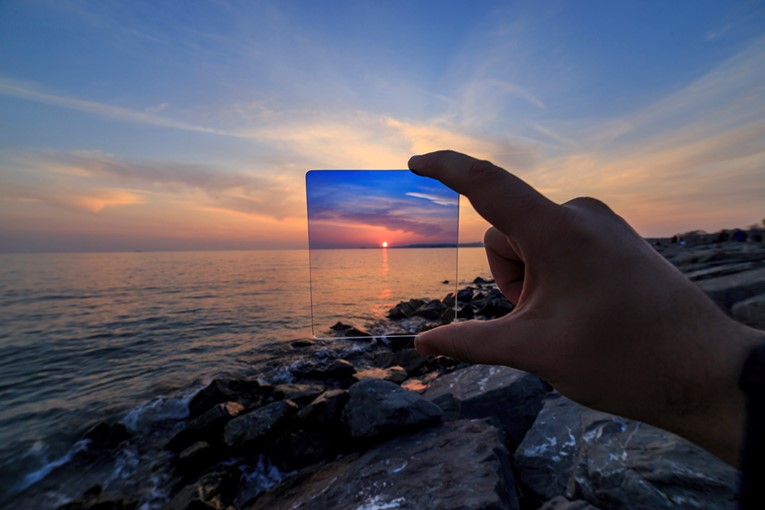
There is a whole spectrum when it comes to ND Grads – they come in a range of ‘strengths’ or densities, depending upon the amount of light that the darker portion cuts out. The most popular filters are 0.6 ND grads which reduce exposure by 2 stops, but it’s worth investing in two or three with differing densities as it will enable you to cope with a range of situations.
You can also combine more than one filters to achieve better densities. This is possible if you have a filter holder with several slots. Using a 0.3 (1 stop) ND Grad and a 0.6 (2 stop) ND Grad together, for example, effectively creates a 0.9 ND Grad giving a 3 stop difference in exposure. There are also hard and soft gradations available, with hard grads being useful when the horizon has a very defined edge (for example a seascape) and soft grads being useful when the horizon is broken by trees or mountains.
Overcoming exposure issues
Don’t shy away from ND Grads – they will help make your photography more impressive, and they aren’t difficult to use either. Generally, they can be used on most camera makes, including the Fuji X Series. The first step in using an ND Grad is to take a couple of test shots to see what the exposure difference is between the land and the sky. For example, if the landscape looks great at 1/125 sec at f/16, but the sky looks better at 1/500 and f/16, there’s a 2-stop difference and a 0.6 ND Grad is ideal.
The ND filter is used after you have got the composition of the landscape – slip the graduated ND filter into the filter holder keeping the grey section of the filter at the top. Look in the viewfinder and push the filter down until the transition between light and dark is aligned with the horizon. Take time to ensure you’ve got this right, and check that the edges of the filter haven’t entered the image frame.
To reduce the brightness of the sky, the filter’s darker section brings the sky’s exposure in line with the required exposure of the land. All you need to do now is set the exposure as you would normally, or use the exposure that worked for the land in your test shot (1/125 at f/16 in our example), and you’ll find that you’re able to get the landscape looking right without burning out the sky.